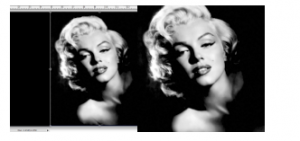
In this assignment you will learn how to COLORIZE. Colorizing is any process that adds color to black and white, sepia or monochromatic images. You will be changing the color of a photograph without damaging the original image. People have used this process to restore old images as well as giving some color to old black and white images. The great thing about photoshop is that you can start with any type of image. The key is to convert it to a black and white image by just adding the black and white adjustment layer in the adjustment panel.
BEFORE AFTER
Tutorial
Step 1:
Go to the Drop Box and click and drag the picture “Marilyn Monroe” to your desktop in order to copy it to your computer. Remember to “eject” from the the Drop Box.
Step 2:
- Open PhotoShop go to File -Open -Marilyn Monroe
- File-Save As- and name your file lastname,first intial_Marilyn Monroe
- Contorl click on your picture in your layers panel and select “Duplicate Layer” from the drop down menu.
- The duplicate layer will be our backup in case we do something awful to our picture. Turn it off and lock and put it below all of your other layers. Label it “Original.”
Step 3:
You want to make sure to focus on your person’s face so crop off anything else with the crop tool . When using the crop tool, click and drag the area that you want to keep and then let go to get a selection box. Once you have your desired area hit the return hey on your keyboard.
Step 4:
Create a new layer in your layers panel and label it “skin.” Make sure that it is placed above your photograph.
Step 5:
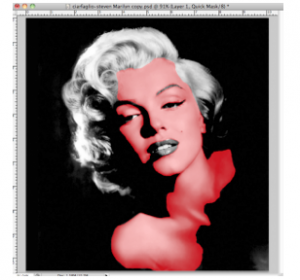
Selecting the skin. Make sure your skin layer is highlighted blue and then click on the “Quick Mask mode” (the circle inside a rectangle icon at the bottom of your tools). Make sure that your foreground and background squares are set to black and white. You are in “Quick Mask mode” when the icon is darker.
Step 6:
Grab your brush tool, set your desired brush size, and decrease the hardness of your brush to about 50%.
Now begin to highlight the skin of your person.
If you accidentally highlight another part of your person’s face just switch the foreground to white and background to black. White subtracts the highlight and black adds the highlight. Make sure you pay attention to detail and zoom in to get every piece of skin and not hair, lips, eyes. etc.
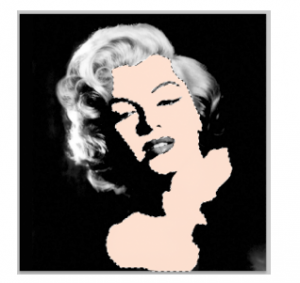
After selecting all of the skin your image should look like this.
Step 7
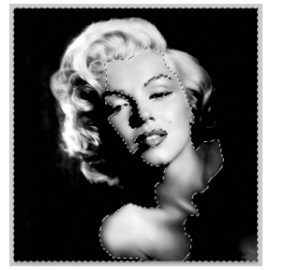
Now click on the “Quick Mask mode” icon so that it turns lighter and watch your highlighted area turn into crawling ants.
If you look closely, everything but the skin is selected.
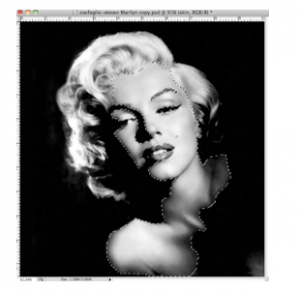
Hold down [ command + shift + I ] keys to invert he selection and your image should now look like this.
There should not be any crawling ants around the borders of the image. If you missed some skin just click back on the “Quick Mask Mode” icon and the selection will go back to the red highlight and you can continue to highlight any missed areas.
Step 8:
Choose the paint bucket tool and select a color for the skin. Move your cursor into the selected area and click in order to have the skin painted.
Hold down [ command + D ] to deselect the area.
Step 9:
The skin tone now needs to blend with the photograph. We have to change the blending mode of the “skin” layer to “color” and drop the opacity to about 80%.
When you make these changes your skin should now look like this:
Now do the rest of Marilyn’s face by following Steps 5-10 for each portion of the face.
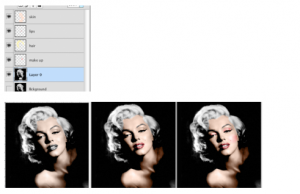
Make sure to label each layer to the appropriate facial feature in order to not get confused. Below is what my layers panel looked like once I was done as well as a step by step of how it looked as I was adding color to the rest of the photograph.
Skin colored
Lips colored
Make-up colored
Hair colored
The Assignment
Requirements:
Search for a photograph of someone famous (Google Celebrity Headshots), preferably a portrait or close up of their face. Celebrities usually have very good head shots of themselves that are well lit and focused. Make sure to get an image with the most number of pixels.
2 images that have been colorized
- 1 portrait image of a person colorized
- 1 full body image of a person and the background colorized
- The colors from the original photograph have been alteredChoose the highest quality image possible so that it does not look pixelated
- Hair
- Skin
- Eyes
- Clothes
- Etc.
- Pay attention to detail and have smooth clean edges when making selections.
- Choose the highest quality photograph when copying it from the internet.
Tip: If you chose an image with color rather than a black and white image just add a black and white adjustment layer. Make sure to have the adjustment layer right above the photograph and nothing in between.

